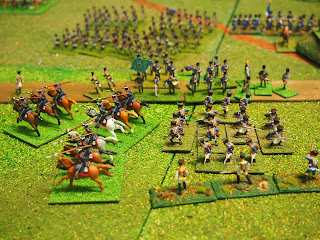
For those who came in late, Lützen was the first major action of the 1813 spring campaign in the War of the Sixth Coalition (War of German Liberation). You can find information about our scenario for this game elsewhere on this blog. Two posts cover the overview and the set-up of the battlefield, but here are a couple of images to set the scene:
Stylised map of the battlefield used to set-up the table.
Our table for Lützen viewed from the south-west, with Starsiedel in the left foreground, the quadrilateral of towns in the centre and the Floßgraben in the distance.
Our historical re-fight began at 11:30 with the Russo-Prussian army's, initially lead by Blücher's I Corps, attack on the isolated divisions of Ney's III Corps; chiefly Souham's 8th Division stationed around Gross Görschen.
Looking along the table, this time from the east. Eisdorf and the Floßgraben are in the foreground. Blücher's I Corps is at left centre, with, from nearest to furtherest, von Klüx's Lower Silesian Brigade, von Pirch I's Upper Silesian Brigade and von Röder's Brandenburg Brigade. In the centre, Souham's 8th Division is in and around Gross Görschen. At the far end of the table von Dolff's Prussian Reserve Cavalry (centre) oppose Girard's 10th Division in front of Starsiedel.
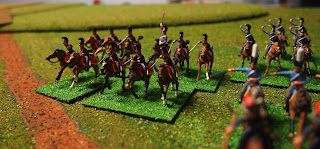
Closer view of von Dolff's Prussian Reserve Cavalry.
The same end of the table, this time looking at Girard's position.
Turn 1, 11:30
Vorwärts! Blücher launched his attack lead by the 1st West Prussian Dragoons of von Klüx's Lower Silesian Brigade,
who caught the 3/40e ligne before they could form square and promptly rode them down, then rallying back behind the Silesian Uhlans.
At the end of the turn, Souham's men arrayed around and in Gross Görschen with the Prussian I Corps pressing strongly.
At the other end of the table, Dolff's cavalry faced-off Girard's infantry, both sides artillery having fired ineffectively.
Turn 2, 12:00
The avalanche continued for Souham's men.
The square of the 19e provisional ligne was broken by a charge of von Pirch I's Silesian Grenadiers.
While on the southern side of Gross Görschen the 6e provisional légère were no match for the Guard Jägers of von Röder's Brandenburg Brigade.
In the north-west 'sector', the stalemate and ineffective artillery fire continued.
Turn 3, 12:30
More Prussian combined arms as the von Klüx's Silesian Uhlans rode down the 4/69e ligne after another failed attempt to form square.
While, ironically, the square of the 3/59e ligne was attacked and broken by a combined attack by the 1st and 2nd battalion of von Pirch I's 1st Silesian Infantry.
Getting a little 'punch drunk', the Silesian Uhlans broke through, trying their luck against the combined 4&6/22e ligne, who cooly formed square and saw off the Prussian horsemen.
The smugness of the 4&6/22e ligne was short-lived; their square was at the pointy end of an attack by the Silesian Grenadiers—the 'square smashers'.
This was all too much for Souham's infantry, many of whom were Marie-Louises, who retreated in the face of the pressure of the 'Prussian inferno' (failed divisional morale at 1/3rd losses)...
even as Ney arrived at the head of Brenier, Ricard and Morand's infantry divisions plus Laboissière's weak light cavalry division.
Overview of the battlefield from the south-west; Souham's division in retreat at the top-centre of the photo.
Bird's-eye view of Ney's advance (top) and the advance of von Klüx and von Pirch I's brigades towards Klein Görschen. Souham's men are retreating at top-left.
Turn 5, 13:30
No rest for the weary: the Silesian Grenadiers took a 'free hack' at Souham's retreating 2/6e légère...
as the 'command arrow's' of von Klüx and von Pirch I's Prussians and Brenier and Ricard's French intersected, just north-west of Klein Görschen!
Ricard's fresh troops restored some French pride, the 4/9e légère drove off, broken von Klüx's 2/1st West Prussian Infantry,
and the 3/9e légère (at left) drove off, the 1/1st West Prussian Infantry.
To the right of the French line, Brenier's men did not have it so good, the 1/136e ligne failed to form square in the face of von Pirch I's Neumarkt dragoons.
Although the 1/29e ligne and 2/29e ligne saw off the attack of the 1st and 2nd battalions of the 1st Silesian Infantry.
This exposed the 'second line; of von Klüx's brigade. Here the West Prussian Grenadiers prepare to attack Ricard's line.
Urged on by Blücher, von Röder's West Prussia Uhlans took a 'free hack' at Souham's retreating men, dispersing the 2/6e légère and 4/34e ligne.
Meanwhile, in the 'western sector' of the battlefield Girard's men prepared themselves for a massed attack...
as von Berg's three Russian infantry divisions and Count Trubetzkoy's Reserve Cavalry advanced to support Dolff's cavarly.
The view across the battlefield from the south-west with Prince Obolenski's Cossacks in the foreground and Generalmajor Lanskoi's hussars beyond them.
Opposite view from the north-east with Ney's troops in the foreground and Kaja just beyond them.
Looking this time from the north-west; Souham's unfortunate men in the bottom foreground being hard-pressed by von Röder's cavalry, the massed formations of Ney's French-allies and von Klüx and von Pirch I's Prussians at the top of the picture, west of the Floßgraben.
Generalmajor Lanskoi's 1st Reserve Cavalry brigade; Alexandria hussars at right, Izoum to the left (playing as the Soumy), White Russia in the rear.
Closer look at the White Russia hussars.
The Tchernigov Mounted Jägers of Pantschoulitschev's 2nd Reserve Cavalry brigade.
The *huge* French-Allied cavalry presence of Laboissière's 23rd Light Cavalry Brigade comprising the Baden Dragoons and 10e Hussars (heavily disguised as the 3e!).
2nd Battalion, Frankfurt am Main “Zweyer” Regiment at the rear of Marchand's 39th 'German' Division (Hessian infantry represented by French line in front of them).
Silesian Cuirassiers of Dolff's Prussian Reserve Cavalry.
In the same formation: East Prussia Cuirassiers (Guard Light Cavalry in the foreground).
Last of Dolff's heavies: the Brandenburg Cuirassiers.
The Tenguinsk and Estonia regiment of von Helfreich's small 14th Division.
Mitau and Riga dragoons of Generalmajor Kasatschkosky's mixed division.
In the same formation: converged grenadiers of the 1st, 5th and 14th division.
Close-up of those grenadiers (Zvezda figures beautifully painted by guess who?!). Apologies for the poor photography.
von Röder's West Prussia Uhlans,
and Brandenburg Hussars.
von Pirch I's Neumarkt dragoon (out of focus in the foreground!) with the combined 1st & 2nd Silesian hussars behind.
So, with seven turns completed the game is fairly evenly poised. The Russo-Prussians have taken most of the honours thus far, particularly the Prussians under the aggressive leadership of Julian von Blücher. The impending removal of Souham’s division as an effective fighting force was a good result and now Girard is facing a sledgehammer blow from the combined forces of Berg's I Corps (Lukov, von Helfreich and Kasatschkosky's divisions), Trubetzkoy's Reserve Cavalry and von Dolff's Prussian Reserve Cavalry. French spirits have been raised by the arrival of Ney’s remaining troops, bringing with it successes against von Pirch I’s brigade, along with the imminent arrival of the Emperor with Marmont's VI Corps—not yet on table but to be placed there in the command phase of the 14:30 turn.
Over the coming eight turns (15:00–18:30) the reinforcements will be arriving thick and fast, for both sides.
Part 2 is scheduled for 13th July and promises to be a cracking conclusion to this most interesting historical re-fight.


This first part is very nice!! Lützen is not easy to refight, and you've got a lot of great looking minis to do that, great work!
ReplyDeletePhil.
Thanks for your support and kind words Phil; as ever!
DeleteWowww. A great show! The serried ranks look superb
ReplyDeleteI am awating the arrival of the Emperor!
Thanks for sharing
Rafa
So am I Rafa!
DeleteAppreciate this, especially as you have 'done' so much of the 1813 campaign yourself
I agree; impressive spread of troops, and very plausible results so far!
ReplyDeletePeter
Thanks Peter.
DeleteI am hoping for a bit less historical accuracy in part 2 when we smash the Russo-Prussian forces (ha, ha)!
No decision in the first half ... we shall have to see what part 2 brings!
ReplyDeleteI'd have been worried if there was David as it would not have been good at all for "my" boys!
ReplyDeleteWe planned this one as a two-parter so as to be able to take our time and enjoy it to the full. The anticipation between sessions is almost unbearable!
wuaoo Its amazing view!
ReplyDeleteHopefully part 2 will be more impressive with over double the number of figures present!
Delete