13:30–14:00
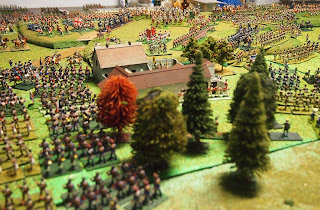
Donzelot's division of d'Erlon's I Corps were at the eastern end of the attack (around La Haie Sainte). Having previously cleared the gravel pit (top right of photo below), the division drove on once again to assault the defenders atop the Mont-Saint-Ridge.
The 2/17e ligne attacked and defeated Roger’s battery Royal Artillery, but the first battalion of the same regiment and the 1/13e légère were stopped in their tracks by a well-delivered volley from the 3/1st (Royal) Foot, who counter-charged, breaking the already-weakened French battalions.
The division was now demoralised. (We think that General Donzelot had been exposed to too much smoke in the attack, hence his darkened countenance!)
A second attempt on La Haie Sainte went the way of the first as Baring's men drove off the attackers.

Meanwhile, on the Anglo-Allied right, Quiot's and Foy's divisions continued their attack between La Haie Sainte and Hougoumont, driving off Sandham’s battery Royal Artillery from Cooke's division.
Further to the west, the 2nd of the Scots Guards were holding their own, supported by Grant's hussars, although the latter failed against a square of the 2/1e légère from Jérôme's division.

Harassed by skirmishers, Piré's 6e lanciers (wearing yellow to suit the occasion) broke.
Back towards the Anglo-Allied left, the 1/21e ligne, lead unit of Marcognet's divison, also finally broke when fired upon by skirmishers; none other than the 95th!
Across on the opposite ridge, the French grand battery was forming up.
A look around the Anglo-Allied defensive line at this juncture (~14:00)
The hand of god points to the Iron Duke, hidden from view at this angle behind his elm!
14:00–14:30
More bad news for Piré's light cavalry as firstly the 5e lanciers,
then the 6e chasseurs à cheval were broken. That was Piré's men done for the day.
Meanwhile the KGL hussars fought like devils, initially resisting the 2e carabinier. They were eventually bested by their heavier armed foes.
In the centre, a third attack on La Haie Sainte went the way of the other two.
Another French attack by the men of Donzelot's division on the 1st Foot was not stopped by the latter's volley, but the British infantry prevailed, ably supported by the Life Guards...
who followed-up onto the French supports, breaking them in turn. With all but one battalion broken, Donzelot's division was well and truly a spent force!
Quiot's men had the only French success for the turn, over-running Cleeve’s battery KGL foot artillery.
Bachelu's 1 & 2 of 2e légère failed against Maitland's Grenadier Guards.
The afore-mentioned grand battery opened up on La Haie Sainte, setting it on fire. It will burn for the remainder of the game.

We'll begin on the Anglo-Allied right, where the 7th hussars charged the 2e carabiniers, hoping to take advantage of the latter's blown state.
They forced the French horsemen to retreat, but they were far from broken.
In the centre, Bachelu's and Quiot's men attacked all along the line.
The 3/2e légère of Bachelu's command were driven off by the Grenadier Guards.
Quiot's men met with better success, breaking the 2/30th line from Colin Halkett's brigade.
The French attack seems to be balance on a knife edge and perhaps about to falter?
Over on the Anglo-Allied left, Marcognet's men attacked their foes on the ridge only to be driven back at all points (including by Hanoverian landwehr--mind you casualties, stagger, position and support were all in favour of the defenders)
Here we see the divison retreating back over 'La Belle Alliance ridge', past Durutte's division (Papelotte just visible in the top right of the photo), having failed divisional morale at 1/2 losses.
15:00–15:30
Left isolated by the retreat of Marcognet's infantry, Delort's cuirassier division was roughly handled by the British artillery (Mark H. reports on his skill with the 6s and 5s on in the entertaining report on his blog).
Their blood up, the 5e cuirassiers charged one of the 'offending' batteries, only to go down in a heap of plasticised metal and horse flesh!
The 10e cuirassiers had better success against the centre battery and rallied back to relative safety behind some of their colleagues in the division.
A look over the battlefield from the 'eastern' end, La Haie Sainte roughly in the centre in the distance. The advancing French grand battery can be seen east of that farmhouse.
Hier ist Blücher!
15:30–16:00
At left front, Durutte's and Jacquinot's divisions changed face to oppose von Losthin's men.
The horse guns in the French grand battery edge closer to the defenders on the Mont-Saint-Jean ridge.
Over on the Anglo-Allied right, where the battle will be won and lost(?), the struggle intensifies, with Lobau's divisions reinforcing Bachelu's and Quiot's between Hougoumont and La Haie Sainte while Jerome infantry and d'Hurbal's heavy cavalry lead the French 'left hook'. Observant readers may note the absence of the Scots Guards behind Hougoumont in the photo below. Attacked by cuirassiers to the front and infantry to the rear, they broke... ignominy!
Hussey's 6th Brigade of hussars moved up to support the hard-pressed infantry, Grant's cavalry having retreated with 1/2 losses.
Situation at 16:00
We'll take my customary 'fly' around the table, starting at the south-west, moving roughly 'east', then 'north' and back 'west' along the Mont-Saint-Jean ridge.
Lastly, some closer photos of the massed attack around Houghoumont,
between the chateau and La Haie Sainte,
the lead elements of von Losthin's 15th Brigade of Bülow's corps, and
the French horse and foot grand batteries massing before the left of the Anglo-Allied position, safely behind Mont-Saint-Jean ridge!Another five marvellous turns. The game is hotting up and we'll definitely reach a conclusion, although may not need the remaining ten available turns (16:00–20:30) to achieve it.
(Read on with part three of this game, posted elsewhere on this blog)


